Spooky Halloween DIY Nail Art 2024: Get Creative with Spooky Halloween DIY Nail Art Ideas for 2024
Halloween is a time for embracing the macabre, and what better way to celebrate the spirit of the season than with some spooky and creative nail art? Whether you’re a seasoned nail artist or a beginner, there are endless possibilities to transform your fingertips into miniature Halloween masterpieces.
This comprehensive guide explores the latest trends in Spooky Halloween DIY Nail Art for 2024, providing inspiration and practical tips for crafting your own haunting nail designs. We’ll delve into a variety of themes, techniques, and essential tools, empowering you to unleash your creativity and create truly unique and unforgettable Halloween looks.
Trending Halloween Nail Art Themes for 2024
The beauty of Halloween nail art lies in its versatility. From classic horror icons to whimsical creatures, there’s a theme to suit every taste. Here are some of the hottest trends predicted to dominate the 2024 Halloween nail art scene:
-
Gothic Glamour: Embrace the dark and elegant side of Halloween with gothic-inspired nail art. Think deep black and burgundy hues, delicate lace patterns, and intricate floral designs. Add a touch of sparkle with silver glitter or holographic accents for a glamorous finish.
-
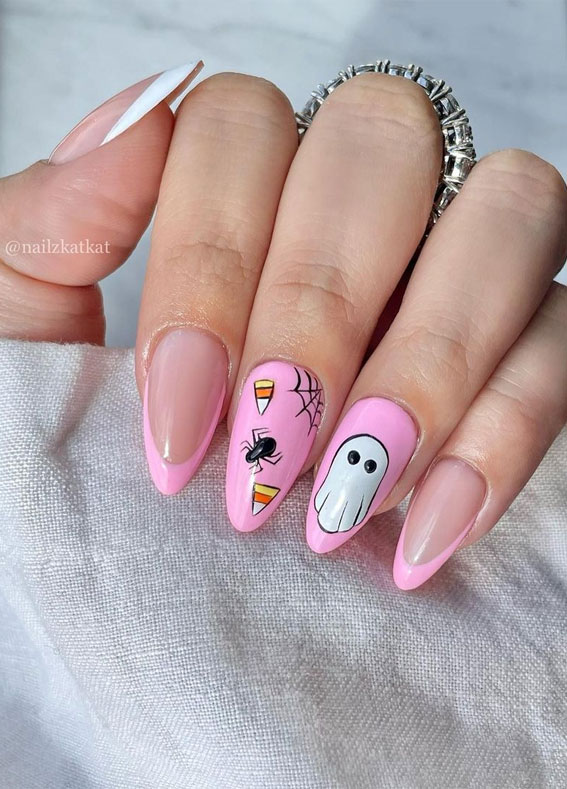
Minimalist Spookiness: For those who prefer a subtle yet stylish approach, minimalist Halloween nail art offers a perfect balance. Opt for simple, geometric designs featuring classic Halloween symbols like bats, spiders, or pumpkins. Use contrasting colors like black and white or a single accent nail for a touch of drama.
-
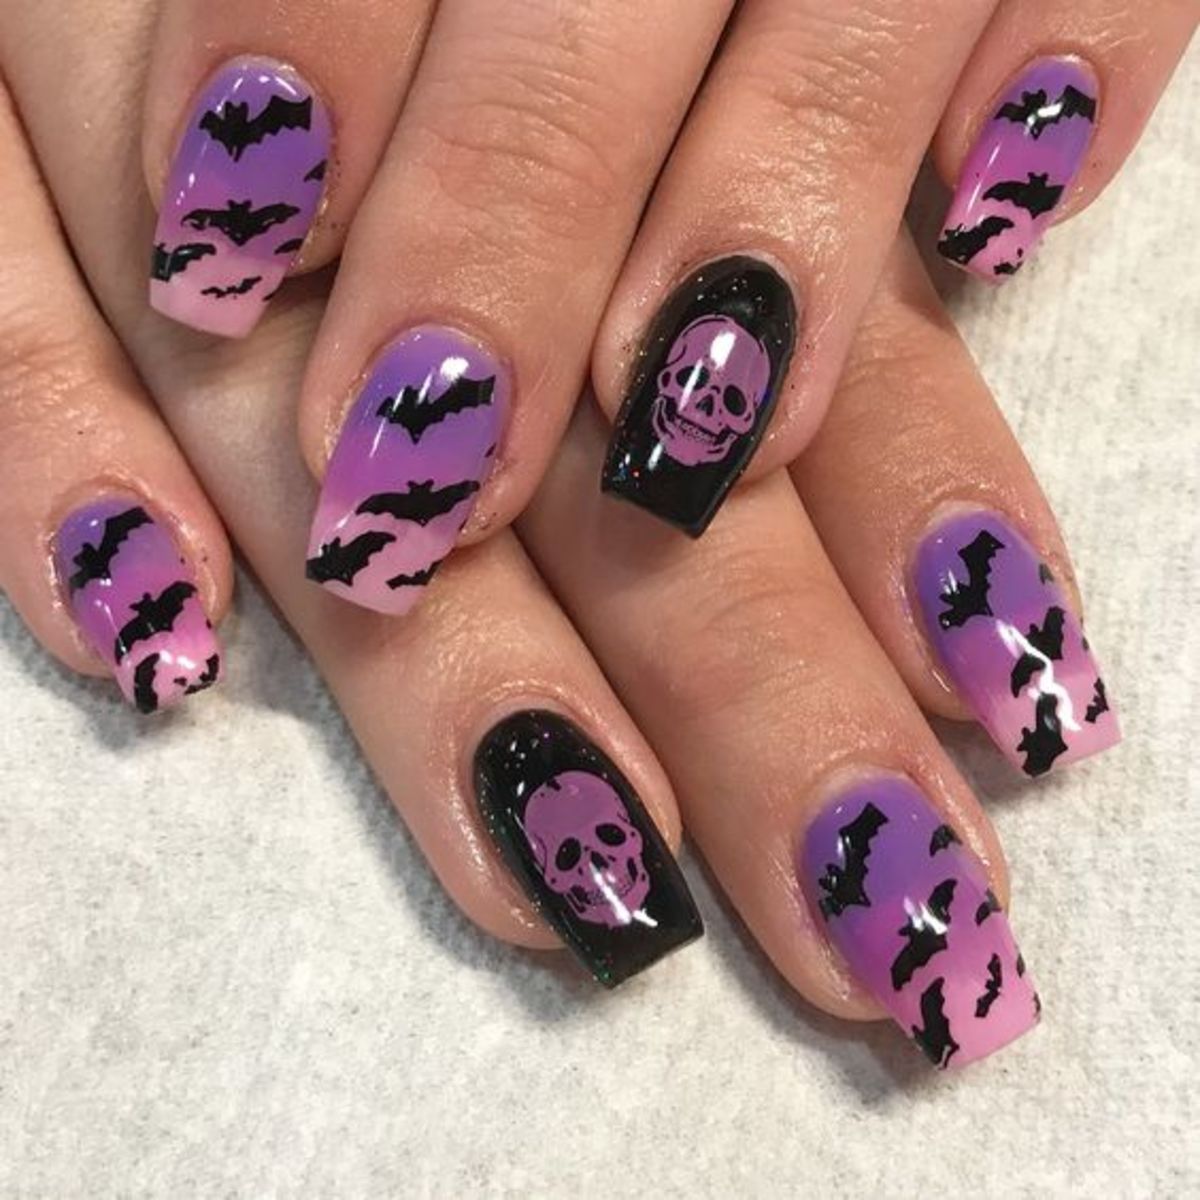
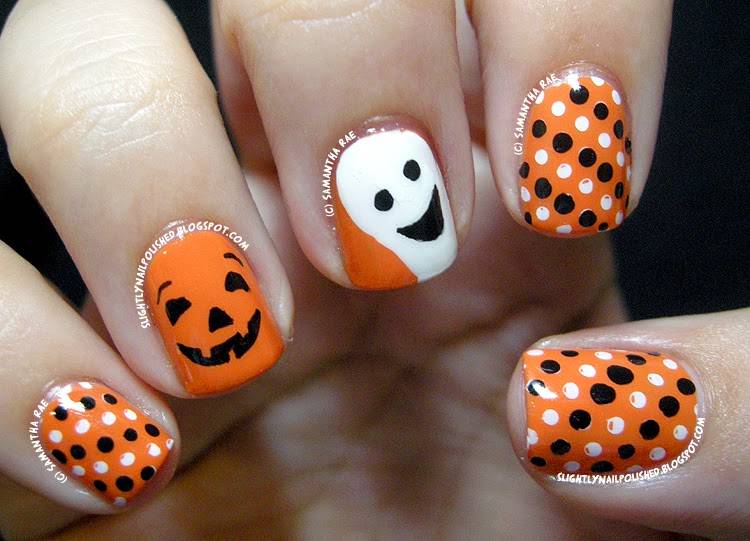
Creature Feature: Unleash your inner monster with nail art inspired by iconic Halloween creatures. From friendly ghosts and playful bats to fearsome zombies and terrifying spiders, the possibilities are endless. Use bold colors, intricate details, and 3D embellishments to bring your creature designs to life.
-
Candy Corn Craze: Embrace the sweetness of Halloween with candy corn-inspired nail art. Use a combination of yellow, orange, and white polishes to create stripes, gradients, or even a full-blown candy corn nail design. Don’t forget to add a touch of sparkle or glitter for a playful finish.
-
Spooky Landscapes: Transform your nails into miniature Halloween scenes with spooky landscapes. Use a combination of colors and textures to create eerie forests, haunted graveyards, or even a full moonlit night sky. Add tiny details like trees, tombstones, or stars for a truly immersive experience.
Essential Tools for DIY Halloween Nail Art
Creating stunning Halloween nail art requires the right tools. Here’s a list of essential items to gather before embarking on your spooky nail art journey:
-
Base Coat and Top Coat: A good base coat ensures smooth application and prevents staining, while a top coat seals in your design and adds shine.
-
Nail Polish: Choose a variety of colors, including black, white, orange, and purple, to create a wide range of designs.
-
Nail Art Brushes: Invest in a set of fine-tipped brushes for intricate details, as well as wider brushes for base coats and larger designs.
-
Dotting Tool: A dotting tool is essential for creating polka dots, spiderwebs, and other circular designs.
-
Nail Art Stickers: Use pre-made nail art stickers to add intricate patterns, characters, or symbols to your designs.
-
Nail Art Stencils: Stencils provide a convenient way to create geometric patterns, stripes, or other repeating designs.
-
Glitter: Add a touch of sparkle with glitter in various colors and sizes.
-
Rhinestones and Other Embellishments: Elevate your designs with rhinestones, beads, charms, and other decorative elements.
-
Nail Art Glue: Use nail art glue to securely attach embellishments and prevent them from falling off.
-
UV Lamp (Optional): If using gel polish, a UV lamp is essential for curing the polish and ensuring a long-lasting finish.
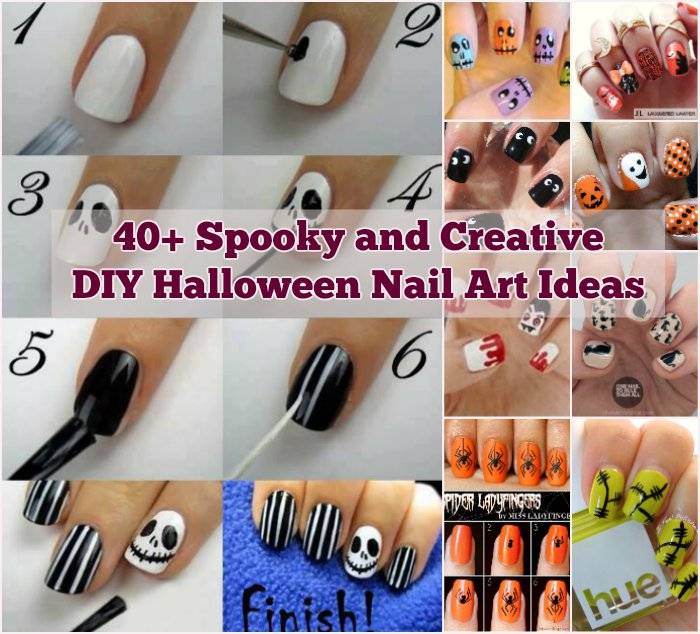
Step-by-Step Guide to Spooky Halloween DIY Nail Art
Now that you have the necessary tools, it’s time to dive into creating your own spooky Halloween nail art. Here’s a step-by-step guide to help you get started:
-
Prepare Your Nails: Start by trimming, filing, and shaping your nails to your desired length and shape. Gently push back your cuticles with a cuticle pusher.
-
Apply a Base Coat: Apply a thin layer of base coat to protect your nails and prevent staining. Allow it to dry completely before proceeding.
-
Choose Your Design: Select a Halloween-themed design that appeals to you. Consider your skill level, desired complexity, and available tools.
-
Apply Base Colors: Apply one or two coats of base color to each nail, depending on the opacity of the polish. Allow each coat to dry completely before moving on to the next.
-
Create Your Design: Using your chosen tools and techniques, carefully create your design. Start with simple shapes and gradually add more intricate details.
-
Add Embellishments (Optional): If desired, add rhinestones, glitter, or other embellishments to enhance your design. Use nail art glue to secure them in place.
-
Apply a Top Coat: Finish by applying a generous layer of top coat to seal in your design and add shine. Allow it to dry completely before using your hands.
Tips for Creating Stunning Halloween Nail Art
Creating impressive Halloween nail art requires both creativity and technical skill. Here are some tips to help you achieve stunning results:
-
Practice Makes Perfect: Don’t be discouraged if your first attempts aren’t perfect. Practice your designs on a piece of paper or a fake nail tip to get a feel for the techniques.
-
Start Simple: Begin with simpler designs and gradually work your way up to more intricate creations.
-
Use Thin Coats: Apply thin coats of nail polish to prevent smudging and allow for even coverage.
-
Clean Up Mistakes: Use a small detail brush dipped in nail polish remover to clean up any mistakes.
-
Use a Steady Hand: When applying intricate details, use a steady hand and avoid shaking your hand.
-
Be Patient: Allow each layer of polish to dry completely before applying the next.
-
Get Creative: Don’t be afraid to experiment with different colors, textures, and techniques to create your own unique designs.
Related Searches: Easy Halloween Nail Art, Halloween Nail Art Ideas for Short Nails, Halloween Nail Art Designs for Beginners, Spooky Nail Art Tutorials, Halloween Nail Art Stickers, Halloween Nail Art Stencils, Halloween Nail Art with Gel Polish, Halloween Nail Art with Acrylic Paint
FAQs About Spooky Halloween DIY Nail Art
Q: How long does Halloween nail art last?
A: The longevity of Halloween nail art depends on the type of polish used. Regular nail polish typically lasts for 5-7 days, while gel polish can last for 2-3 weeks.
Q: How do I remove Halloween nail art?
A: To remove regular nail polish, use cotton balls soaked in nail polish remover. For gel polish, use a gel polish remover and follow the manufacturer’s instructions.
Q: Can I use acrylic paint for Halloween nail art?
A: Yes, you can use acrylic paint for Halloween nail art. However, it’s important to use a sealant to protect the paint and prevent it from chipping or cracking.
Q: How can I make my Halloween nail art last longer?
A: To prolong the life of your Halloween nail art, apply a top coat every few days. Avoid using your nails for tasks that could cause chipping or breakage.
Q: What are some popular Halloween nail art designs?
A: Popular Halloween nail art designs include pumpkins, bats, ghosts, spiders, candy corn, and skulls.
Q: How can I make my Halloween nail art more unique?
A: To make your Halloween nail art more unique, try incorporating personal touches, such as using your favorite colors, adding glitter, or creating your own custom designs.
Conclusion
Halloween nail art offers a creative and fun way to celebrate the spooky season. With a little imagination and the right tools, you can transform your fingertips into miniature Halloween masterpieces. From classic horror icons to whimsical creatures, there’s a theme to suit every taste and skill level. Embrace the spirit of Halloween and unleash your creativity with Spooky Halloween DIY Nail Art in 2024.
Remember, the most important aspect of Halloween nail art is to have fun and express your unique style. So, gather your supplies, choose your favorite designs, and let your creativity flow!