Must-Have Pumpkin Carving Tools for Halloween 2024

Halloween is a time for celebration, spooky decorations, and of course, pumpkin carving. A well-carved pumpkin can be the centerpiece of your Halloween decor, adding a touch of whimsy and fright to your home. But to achieve a truly impressive pumpkin masterpiece, you need the right tools.
This guide explores the essential tools for pumpkin carving in 2024, providing a comprehensive overview of each tool’s purpose, benefits, and how to use them effectively.
Essential Pumpkin Carving Tools
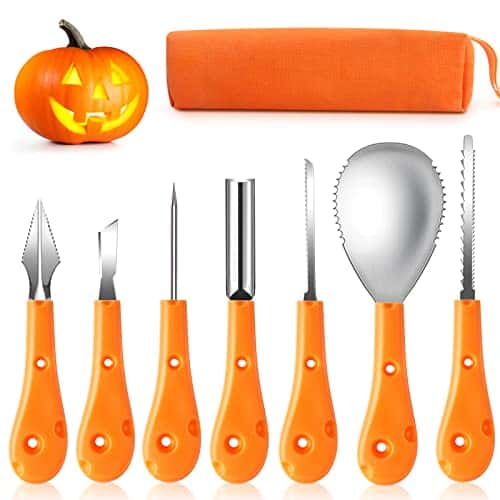
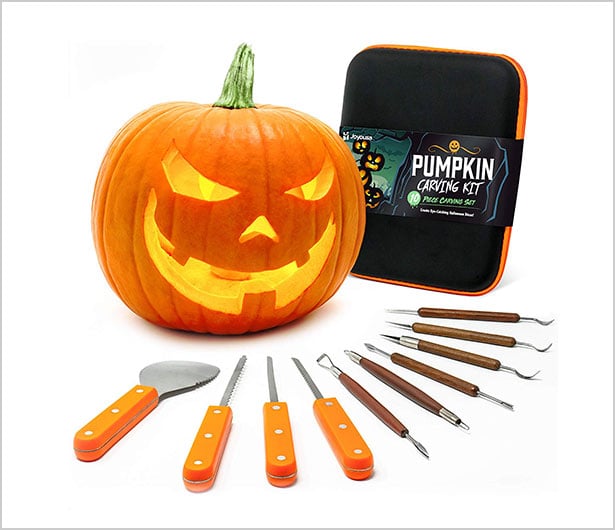
1. Pumpkin Carving Kit:
A pumpkin carving kit is an excellent starting point for beginners and seasoned carvers alike. These kits typically include a variety of tools designed for various tasks, making them a cost-effective and convenient option.
Contents of a Typical Pumpkin Carving Kit:
- Saw: A serrated saw with a sturdy handle for cutting the lid and removing excess pumpkin flesh.
- Scooping Tool: A long, narrow tool with a rounded edge for scooping out the pumpkin’s innards.
- Carving Tools: A set of tools with different shapes and sizes for creating intricate designs. This might include gouges, saws, and detail tools.
- Templates: Pre-designed templates for easy carving inspiration.
- Marker Pen: For tracing designs onto the pumpkin.
- Candle or LED Light: To illuminate your carved pumpkin.
Benefits of Using a Pumpkin Carving Kit:
- Convenience: Kits provide a complete set of tools, eliminating the need to purchase individual items.
- Variety: The different tools cater to various carving needs, allowing for greater creativity.
- Affordability: Kits often offer a better value compared to buying individual tools.
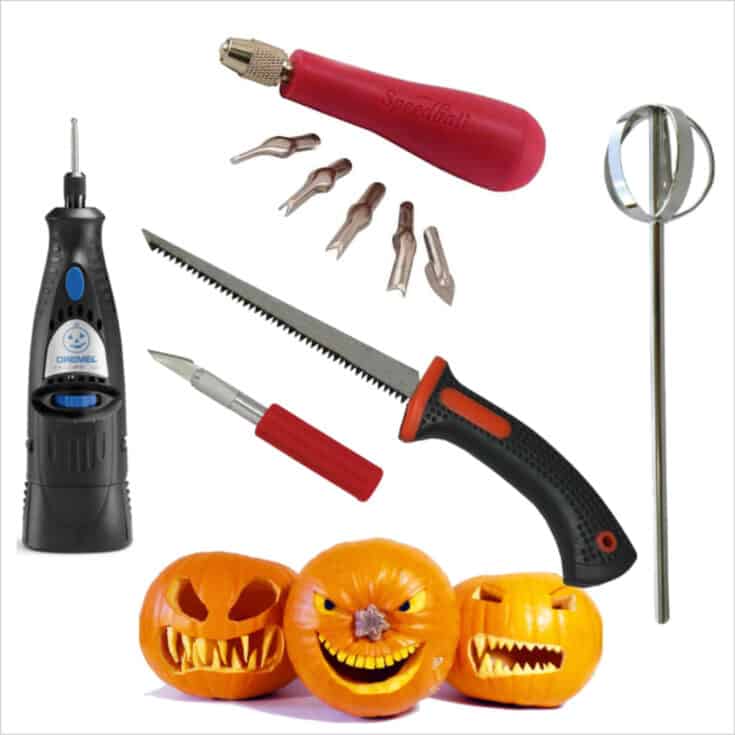
2. Pumpkin Saw:
A pumpkin saw is a must-have for any serious pumpkin carver. It features a serrated blade designed for cutting through the tough pumpkin skin and flesh efficiently.
Key Features:
- Serrated Blade: Ensures smooth and precise cuts without tearing or shredding the pumpkin.
- Sturdy Handle: Provides a secure grip and leverage for effortless sawing.
- Different Sizes: Available in various sizes to accommodate different pumpkin sizes.
Using a Pumpkin Saw:
- Mark the Lid: Use a marker to outline the lid shape on the pumpkin.
- Cut the Lid: Carefully saw along the marked line, ensuring a clean and even cut.
- Remove the Lid: Gently lift the lid off the pumpkin.
3. Pumpkin Scooping Tool:
A scooping tool, often called a pumpkin scoop, is essential for removing the pumpkin’s innards.
Key Features:
- Long Handle: Provides leverage for efficient scooping.
- Rounded Edge: Helps scrape the flesh from the pumpkin walls without damaging the design.
- Durable Construction: Made from sturdy materials to withstand the rigors of scooping.
Using a Pumpkin Scooping Tool:
- Scoop Out the Seeds: Insert the scooping tool into the pumpkin and scoop out the seeds and pulp.
- Clean the Walls: Use the tool to scrape the flesh from the pumpkin walls, ensuring a clean canvas for carving.
4. Pumpkin Carving Tools:
Pumpkin carving tools come in a wide variety of shapes and sizes, each designed for specific carving techniques.
Types of Pumpkin Carving Tools:
- Gouges: Have a U-shaped blade for creating grooves and lines.
- Saws: Smaller, more delicate saws for cutting intricate designs.
- Detail Tools: Small, pointed tools for creating fine details and patterns.
- Liners: Thin, flat tools for outlining designs.
- Transfer Tools: Used to transfer designs from templates to the pumpkin.
Choosing the Right Tools:
- Beginner: Start with a basic set of gouges, a saw, and a detail tool.
- Intermediate: Add specialized tools like liners and transfer tools to enhance your carving skills.
- Advanced: Invest in a wide range of tools to create complex and intricate designs.
5. Pumpkin Carving Templates:
Pumpkin carving templates provide pre-designed patterns for easy carving.
Types of Templates:
- Paper Templates: Easily transferable to the pumpkin using a pencil or marker.
- Plastic Templates: Reusable and durable, offering a more precise transfer.
- Digital Templates: Printable templates for a wide range of designs.
Using Templates:
- Select a Template: Choose a design that matches your carving skill level and preferences.
- Transfer the Design: Use a marker or pencil to trace the template onto the pumpkin.
- Carve the Design: Carefully carve along the traced lines using the appropriate carving tools.
6. Pumpkin Carving Markers:
Pumpkin carving markers are used to trace designs onto the pumpkin before carving.
Key Features:
- Washable Ink: Easily removes from the pumpkin with water.
- Visible Lines: Creates clear lines that are easy to follow during carving.
- Variety of Colors: Available in various colors to suit your design needs.
Using Pumpkin Carving Markers:
- Choose a Marker: Select a marker with a fine tip for precise tracing.
- Transfer the Design: Trace the template onto the pumpkin with the marker.
- Carve the Design: Carefully carve along the marked lines.
7. Pumpkin Carving Lighting:
Lighting is crucial for showcasing your carved pumpkin.
Lighting Options:
- Candles: Traditional and cost-effective, but require caution due to fire hazards.
- LED Lights: Safe and long-lasting, providing a bright and even glow.
- Battery-Powered Lights: Portable and easy to use, offering a variety of colors and effects.
Choosing the Right Lighting:
- Candle: Suitable for small pumpkins and indoor use.
- LED Light: Ideal for large pumpkins and outdoor display.
- Battery-Powered Light: Versatile and convenient for any pumpkin size or setting.
Related Searches
1. Pumpkin Carving Ideas:
This search leads to websites and articles offering a vast array of pumpkin carving ideas, from classic jack-o’-lantern faces to intricate and creative designs. You can find inspiration for different themes, characters, and patterns, ranging from spooky to whimsical.
2. Pumpkin Carving Patterns:
This search focuses on specific patterns and designs for pumpkin carving. You can find printable templates, free downloadable designs, and even tutorials on creating unique patterns. This is a great resource for those who want to try more advanced carving techniques or explore different themes.
3. Pumpkin Carving Tools for Beginners:
This search provides information and recommendations for beginner-friendly pumpkin carving tools. Websites and articles offer guidance on choosing the right starter kit, essential tools, and tips for safe and successful carving.
4. Pumpkin Carving for Kids:
This search caters to families looking for age-appropriate pumpkin carving activities for children. You can find simple and easy designs, kid-friendly tools, and safety tips for making pumpkin carving a fun and engaging experience for the whole family.
5. Pumpkin Carving Techniques:
This search focuses on different techniques used in pumpkin carving, from basic carving techniques to more advanced methods. You can learn about techniques like outlining, gouging, detail work, and creating 3D effects.
6. Pumpkin Carving Contest:
This search leads to websites and articles about pumpkin carving contests, including local, regional, and national events. You can find information about contest rules, judging criteria, and prize categories.
7. Pumpkin Carving Safety Tips:
This search emphasizes safety precautions for pumpkin carving, particularly for children. You can find tips on using tools safely, handling sharp objects, and preventing injuries.
8. Pumpkin Carving History:
This search explores the history and origins of pumpkin carving, tracing its roots back to ancient Celtic traditions and the symbolism associated with pumpkins during Halloween.
FAQs
Q: What is the best way to clean a pumpkin before carving?
A: To clean a pumpkin before carving, wash it thoroughly with soap and water. Rinse it well and dry it completely. Removing any dirt or debris will make carving easier and prevent bacteria from contaminating the pumpkin.
Q: How do I prevent my pumpkin from rotting too quickly?
A: To prevent your pumpkin from rotting too quickly, follow these tips:
- Choose a Fresh Pumpkin: Select a pumpkin with a firm, unblemished skin.
- Store in a Cool Place: Keep the carved pumpkin in a cool, dry location, away from direct sunlight or heat.
- Use a Candle or LED Light: Candlelight can help dry out the pumpkin and slow down the rotting process. LED lights are a safer alternative.
- Apply Petroleum Jelly: Rub petroleum jelly around the cut edges of the pumpkin to seal in moisture.
Q: How can I make my pumpkin carving last longer?
A: To make your pumpkin carving last longer, consider these tips:
- Choose a Large Pumpkin: Larger pumpkins tend to last longer than smaller ones.
- Carve Thinly: Avoid carving too deeply into the pumpkin, as this can weaken the structure.
- Use a Protective Spray: Apply a pumpkin carving sealant or a clear acrylic spray to help preserve the carving.
Q: Can I carve a pumpkin with a knife?
A: While a knife can be used for pumpkin carving, it is not recommended. Knives are not designed for carving pumpkins and can be dangerous to use. It’s best to use specialized pumpkin carving tools for safety and precision.
Q: How do I get rid of my pumpkin after Halloween?
A: After Halloween, dispose of your pumpkin safely by:
- Composting: Cut the pumpkin into smaller pieces and add it to your compost pile.
- Recycling: Check with your local recycling center to see if they accept pumpkins.
- Discarding: Place the pumpkin in a designated trash container.
Tips
1. Start with Simple Designs: Beginners should start with simple designs and gradually work their way up to more complex carvings.
2. Practice on a Smaller Pumpkin: Before carving your main pumpkin, try practicing on a smaller one. This will help you get comfortable with the tools and techniques.
3. Use a Template: Using a template can make carving easier and more precise.
4. Carve in Sections: Instead of carving the entire design at once, carve it in sections. This will help prevent the pumpkin from cracking or breaking.
5. Take Breaks: Carving can be time-consuming, so take breaks to rest your hands and avoid fatigue.
6. Clean Your Tools: Clean your carving tools thoroughly after each use to prevent rust and ensure they stay sharp.
7. Protect Your Work: Apply a pumpkin carving sealant or a clear acrylic spray to protect your carving from the elements.
Conclusion
Pumpkin carving is a fun and creative way to celebrate Halloween. By using the right tools and techniques, you can create a truly impressive pumpkin masterpiece. From basic carving kits to specialized tools, there is a wide range of options available to suit any skill level and budget. With a little practice and creativity, you can carve pumpkins that will be the envy of your neighborhood.