How to Make Halloween-Themed Nail Art 2024: Creative and Spooky Designs for Your Nails
Halloween is a time for spooky fun, and what better way to celebrate than with some festive nail art? How to Make Halloween-Themed Nail Art 2024: Creative and Spooky Designs for Your Nails can be a fun and creative way to express your spooky spirit and add a touch of Halloween magic to your look. From classic pumpkins and bats to more elaborate and intricate designs, the possibilities are endless.
This guide will delve into the world of Halloween nail art, providing inspiration and step-by-step instructions to help you create captivating designs that will turn heads. We will explore various techniques, tools, and materials, as well as offer tips and tricks for achieving professional-looking results.
The Importance of Halloween Nail Art
Halloween nail art is more than just a fun activity; it is a way to express your individual style and celebrate the spirit of the holiday. It allows you to:
- Embrace the Spookiness: Halloween nail art offers a creative platform to showcase your love for all things spooky, from ghoulish ghosts to menacing monsters.
- Showcase Your Creativity: There are endless possibilities for Halloween nail art, allowing you to experiment with different colors, textures, and designs to create unique and personalized looks.
- Enhance Your Halloween Costume: Completing your Halloween costume with matching nail art can elevate your overall look and create a cohesive and memorable ensemble.
- Add a Touch of Fun: Halloween nail art can be a fun and playful way to add a touch of festivity to your everyday look, bringing a smile to your face and those around you.
- Boost Your Confidence: Creating your own Halloween nail art can be a rewarding experience that boosts your confidence and creativity.
Essential Tools and Materials
Before embarking on your Halloween nail art journey, gather the following essential tools and materials:
- Nail Polish: A variety of colors, including black, orange, white, and purple, are essential for creating spooky designs. Consider investing in metallic polishes for added shimmer and sparkle.
- Base Coat: A clear base coat helps protect your nails and ensures a smooth surface for your nail art.
- Top Coat: A top coat seals in your design and adds a glossy finish, protecting your nail art from chipping and fading.
- Nail Art Brushes: Invest in a set of fine detail brushes, dotting tools, and striping brushes for precise application and intricate designs.
- Nail Art Stickers: Pre-designed stickers offer an easy way to add intricate details, patterns, and Halloween motifs to your nails.
- Nail Art Stencils: Stencils provide a simple way to create clean lines and precise designs, perfect for beginners.
- Nail Art Glitter: Add a touch of sparkle and shimmer to your designs with different types of glitter, from fine shimmer to chunky glitter.
- Nail Art Gems: Gems and rhinestones can add a touch of glamour and dimension to your Halloween nail art.
- Nail Art Pens: These specialized pens allow you to draw intricate details and designs with ease.
- Nail Art Tape: Use tape to create clean lines and geometric designs.
- Cuticle Pusher: Use a cuticle pusher to gently push back your cuticles and prepare your nails for nail art.
- Nail File: File your nails into your desired shape and smooth out any rough edges.
- Nail Clippers: Trim your nails to the desired length.
- Cotton Balls and Nail Polish Remover: Use cotton balls and nail polish remover to clean up any mistakes and remove excess polish.
Preparing Your Nails for Nail Art
Proper nail preparation is crucial for achieving a long-lasting and professional-looking Halloween nail art design. Follow these steps:
- Clean Your Nails: Wash your hands thoroughly with soap and water to remove any dirt or oil that could interfere with the adhesion of the polish.
- Trim and File: Trim your nails to your desired length and file them into your preferred shape, whether it be square, oval, or almond.
- Push Back Cuticles: Gently push back your cuticles with a cuticle pusher to create a smooth canvas for your nail art.
- Apply a Base Coat: Apply a thin layer of base coat to protect your nails and create a smooth surface for the polish. Allow the base coat to dry completely before proceeding.
Halloween Nail Art Design Ideas
The beauty of Halloween nail art lies in its versatility. From simple and elegant designs to elaborate and intricate creations, there’s something for every taste and skill level. Here are some inspiring ideas to get your creative juices flowing:
Classic Halloween Designs:
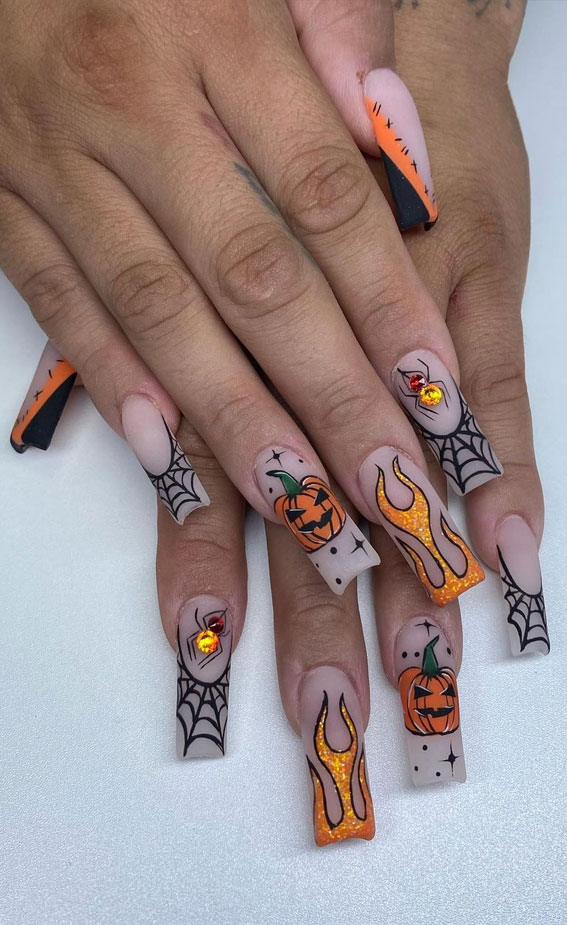
- Pumpkin: A classic Halloween staple, the pumpkin can be painted in various shades of orange, yellow, and green, with a simple jack-o’-lantern face or intricate details.
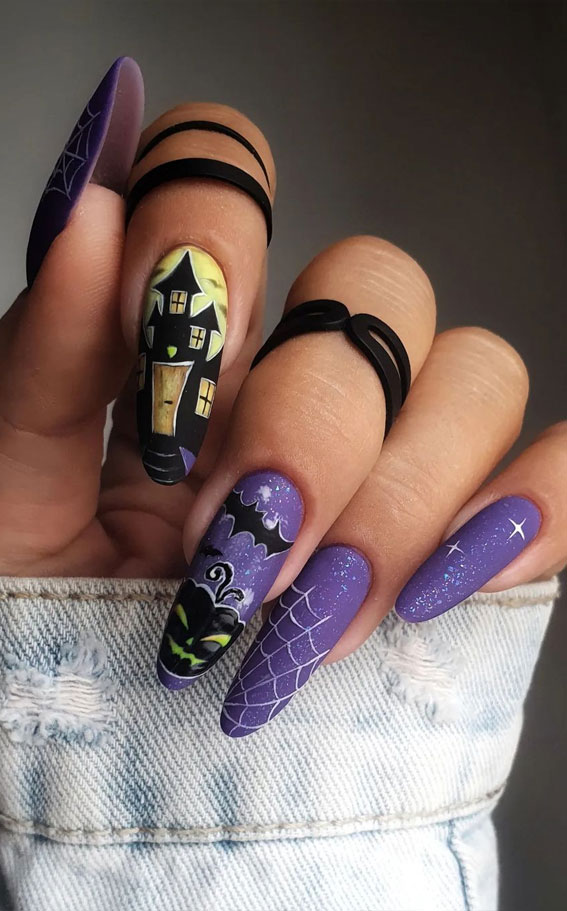
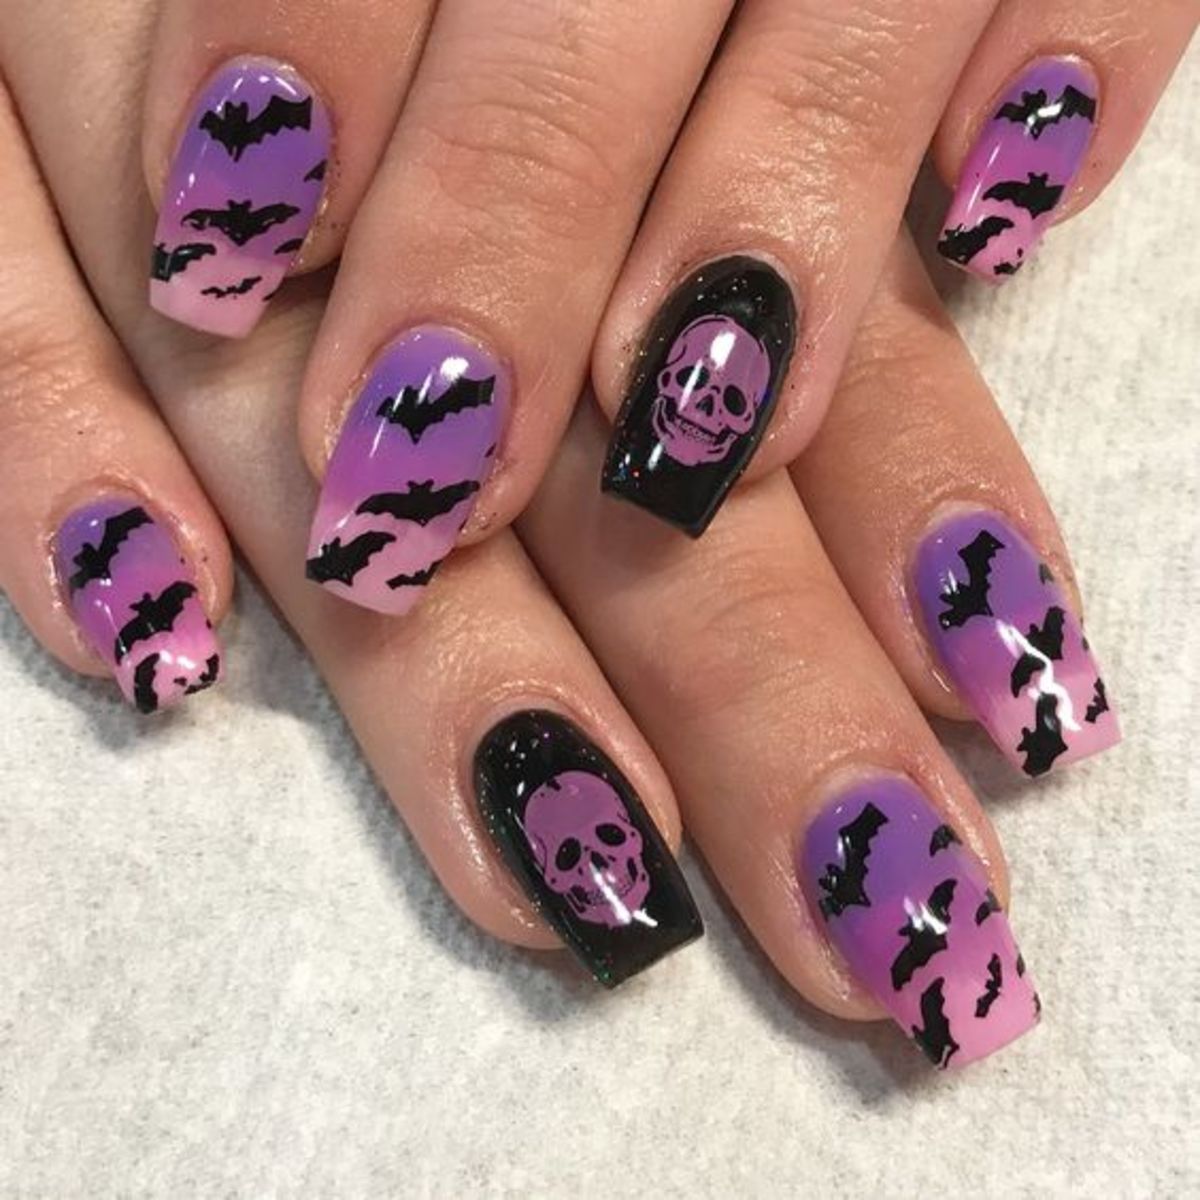
- Bat: Black bats with wings outstretched are a timeless Halloween symbol. You can create a simple silhouette or add details like eyes and teeth.
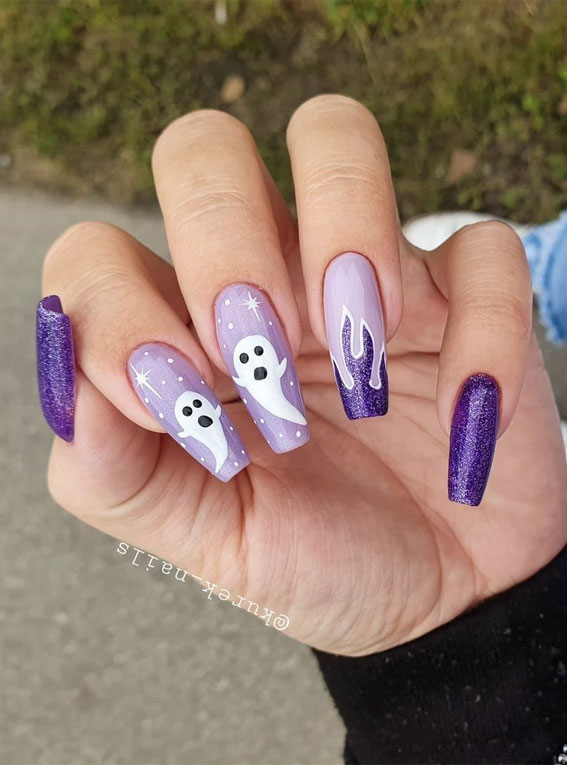
- Ghost: White ghosts with spooky expressions or simple outlines can be a fun and easy design.
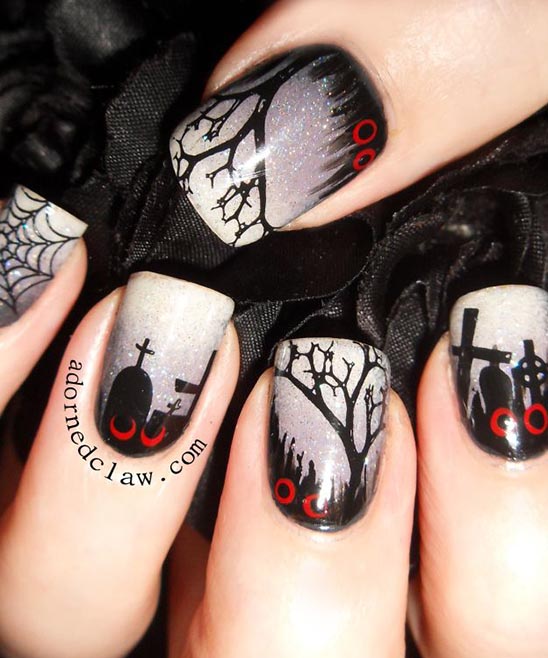
- Spiderweb: A classic Halloween motif, spiderwebs can be created with black nail polish and a fine detail brush or a nail art stencil.
- Spider: Black spiders with eight legs and shiny eyes can be a fun and creepy addition to your Halloween nail art.
Creative and Unique Designs:
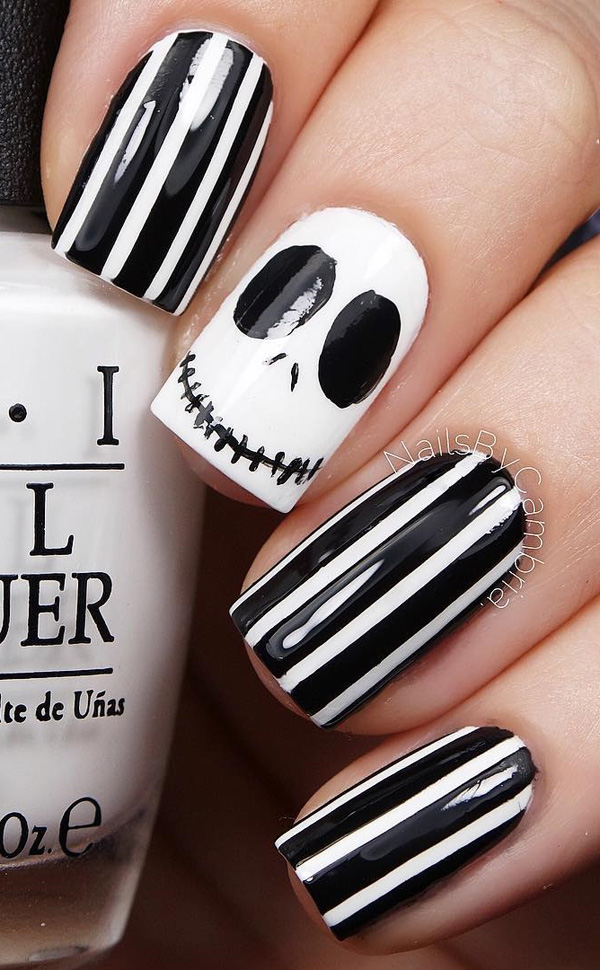
- Skeleton: A full skeleton design can be a dramatic and impressive Halloween nail art look. You can create a simple outline or add intricate details like ribs and skull features.
- Witch: A witch silhouette with a pointed hat and broom can be a fun and whimsical design. You can add details like a wart on the nose or a cauldron.
- Vampire: A vampire with fangs and a cape can be a spooky and elegant design. You can create a simple silhouette or add details like red eyes and a flowing cape.
- Candy Corn: A playful and festive design, candy corn can be created with orange, yellow, and white nail polish.
- Frankenstein: A Frankenstein monster with stitches and green skin can be a fun and spooky design. You can add details like a bolt in the neck or a wild hairstyle.
Trendy Halloween Designs:
- Ombre: Create a spooky ombre effect with black, purple, and orange nail polish, blending them together for a gradient look.
- Negative Space: Use negative space to create a spooky silhouette, such as a ghost or a bat, against a solid color background.
- Glitter: Add a touch of sparkle and shimmer to your Halloween nail art with glitter. You can create a full glitter effect or use glitter accents to highlight specific details.
- 3D Nail Art: Add dimension to your Halloween nail art with 3D elements like gems, rhinestones, and nail art charms.
- Metallic Polishes: Metallic polishes in gold, silver, and copper can add a touch of glamour and sophistication to your Halloween nail art.
Tips for Creating Halloween Nail Art
- Start with a Clean Canvas: Ensure your nails are clean and free of any oils or lotions before applying nail polish.
- Use Thin Coats: Apply thin coats of polish to prevent smudging and allow for faster drying time.
- Clean Up Mistakes: Use a cotton swab dipped in nail polish remover to clean up any mistakes and create sharp lines.
- Practice Makes Perfect: Practice your designs on a piece of paper or a nail art practice pad before applying them to your nails.
- Use a Top Coat: Apply a top coat to seal in your design and protect it from chipping and fading.
Related Searches
1. Easy Halloween Nail Art Designs: Focus on simple and beginner-friendly designs that require minimal tools and techniques. Examples include:
- Pumpkin with a Simple Face: Use orange and black nail polish to create a basic pumpkin shape with a simple jack-o’-lantern face.
- Bat Silhouette: Create a simple bat silhouette with black nail polish and a fine detail brush.
- Spiderweb with a Single Spider: Use a nail art stencil or a fine detail brush to create a spiderweb and add a single black spider in the center.
2. Spooky Halloween Nail Art: Emphasize designs that are spooky and eerie, perfect for those who want a more chilling Halloween look. Examples include:
- Skeleton Hand: Create a detailed skeleton hand design using black and white nail polish and a fine detail brush.
- Vampire Fangs: Paint a simple vampire fang design on your accent nail using red nail polish and a fine detail brush.
- Ghost with a Glowing Eye: Create a white ghost silhouette with a single glowing eye using white and yellow nail polish.
3. Halloween Nail Art Ideas for Short Nails: Provide design ideas specifically tailored for short nails, ensuring that the designs are proportionate and visually appealing. Examples include:
- Simple Pumpkin with a Stem: Paint a small pumpkin shape on your nail and add a green stem using a fine detail brush.
- Bat with Wings on One Nail: Create a bat silhouette with wings on one accent nail using black nail polish.
- Minimalist Spiderweb: Paint a small spiderweb design on one nail using black nail polish and a fine detail brush.
4. Halloween Nail Art for Long Nails: Offer design ideas that take advantage of the extra space on long nails, allowing for more intricate and elaborate designs. Examples include:
- Full Skeleton Design: Create a detailed skeleton design that covers the entire nail using black and white nail polish.
- Spooky Ombre with Glitter: Create an ombre effect with black, purple, and orange nail polish and add glitter accents for a glamorous touch.
- Witch Silhouette with a Broom: Paint a witch silhouette with a pointed hat and a broom on your accent nail using black and purple nail polish.
5. Halloween Nail Art Tutorials: Provide step-by-step tutorials for creating specific Halloween nail art designs. Examples include:
- How to Paint a Pumpkin: Guide readers through the process of painting a pumpkin with a jack-o’-lantern face using orange, yellow, and black nail polish.
- How to Create a Spiderweb: Show readers how to create a spiderweb using a nail art stencil or a fine detail brush.
- How to Paint a Bat: Provide a tutorial on painting a bat silhouette with wings using black nail polish.
6. Halloween Nail Art with Gel Polish: Focus on using gel polish for Halloween nail art, highlighting the benefits of gel polish for durability and shine. Examples include:
- Ombre with Gel Polish: Show readers how to create an ombre effect using gel polish in black, purple, and orange.
- Glitter Gel Polish Designs: Showcase various designs using glitter gel polish, including simple glitter accents or full glitter nails.
- Negative Space with Gel Polish: Demonstrate how to create negative space designs using gel polish, such as a ghost or a bat silhouette.
7. Halloween Nail Art Trends: Explore current trends in Halloween nail art, including popular designs, colors, and techniques. Examples include:
- Metallic Halloween Nail Art: Showcase designs using metallic polishes in gold, silver, and copper, adding a touch of glamour to Halloween nail art.
- 3D Halloween Nail Art: Highlight the use of 3D elements like gems, rhinestones, and charms to create dimensional Halloween nail art.
- Halloween Nail Art with Nail Art Pens: Explore the use of nail art pens to create intricate designs and detailed Halloween motifs.
8. Halloween Nail Art for Kids: Offer fun and easy Halloween nail art designs that are suitable for children, emphasizing safety and non-toxic materials. Examples include:
- Simple Pumpkin with a Smile: Paint a basic pumpkin shape with a simple smile using orange and black nail polish.
- Ghost with a Dotted Eye: Create a white ghost silhouette with a single dot for an eye using white and black nail polish.
- Spiderweb with a Dotted Spider: Paint a simple spiderweb and add a dotted spider using black nail polish.
FAQs
1. What is the best base coat for nail art?
A clear base coat that is specifically designed for nail art is ideal. Look for a base coat that is smooth and provides a good foundation for your nail polish.
2. How do I prevent nail polish from chipping?
Apply a thin layer of top coat after your nail art is complete. Reapply a top coat every few days to maintain a smooth finish and prevent chipping.
3. What are the best nail art brushes for beginners?
A set of fine detail brushes, dotting tools, and striping brushes is a good starting point for beginners. These brushes allow you to create a variety of designs with ease.
4. How do I remove nail art stickers?
Gently peel off the nail art stickers from the edge of the nail. If the stickers are stubborn, soak a cotton ball in nail polish remover and place it on the sticker for a few minutes before peeling it off.
5. Can I use regular nail polish for Halloween nail art?
Yes, you can use regular nail polish for Halloween nail art. However, gel polish is more durable and provides a longer-lasting finish.
6. How do I create a clean line with nail art tape?
Place the nail art tape on the nail in the desired position. Use a fine detail brush to paint the polish around the tape. Remove the tape carefully before the polish dries completely.
7. How do I create an ombre effect with nail polish?
Start with a light color at the base of the nail and gradually blend in a darker color towards the tip. You can use a sponge or a brush to create the ombre effect.
8. How do I add glitter to my Halloween nail art?
Apply a thin layer of clear nail polish to the desired area. Sprinkle glitter over the wet polish and allow it to dry completely.
Tips for Success
- Practice Patience: Creating intricate nail art designs takes time and practice. Don’t be discouraged if your first attempts aren’t perfect.
- Start with Simple Designs: Begin with simple designs and gradually work your way up to more complex designs as you gain confidence.
- Use Quality Materials: Investing in high-quality nail polish, brushes, and other materials will ensure a smooth and professional-looking finish.
- Experiment with Different Techniques: Don’t be afraid to experiment with different techniques and tools to discover what works best for you.
- Have Fun: Nail art is a creative outlet, so have fun and let your imagination run wild.
Conclusion
How to Make Halloween-Themed Nail Art 2024: Creative and Spooky Designs for Your Nails is a fun and rewarding way to express your spooky spirit and celebrate the holiday. With a little creativity and practice, you can create captivating designs that will turn heads and make your Halloween look unforgettable. Remember to experiment with different designs, colors, and techniques to find your unique style. Most importantly, have fun and embrace the spookiness of the season!